


 20
20
E-verify Toggle
SOP Number: YES00029
Effective Date: 12/31/2024
Revision Date: 12/31/2024
Owner: Operations
Review Frequency: [Quarterly]
Responsibilities
List the roles and their responsibilities for this procedure. Be specific about who is responsible for each part of the process.
-
Role 1: Recruiter
-
Role 2: Account Manager
![]()
Definitions
Provide definitions for any terms or acronyms used in this SOP that may not be commonly understood.
![]()
Procedure Steps
Toggling E-Verify as a Requirement at the Client/Job Level
As we move forward in updating our company practice, allowing the toggling of E-verify at the client level. This walkthrough will help you know how to turn off and on the E-verify requirement for each job that you post.
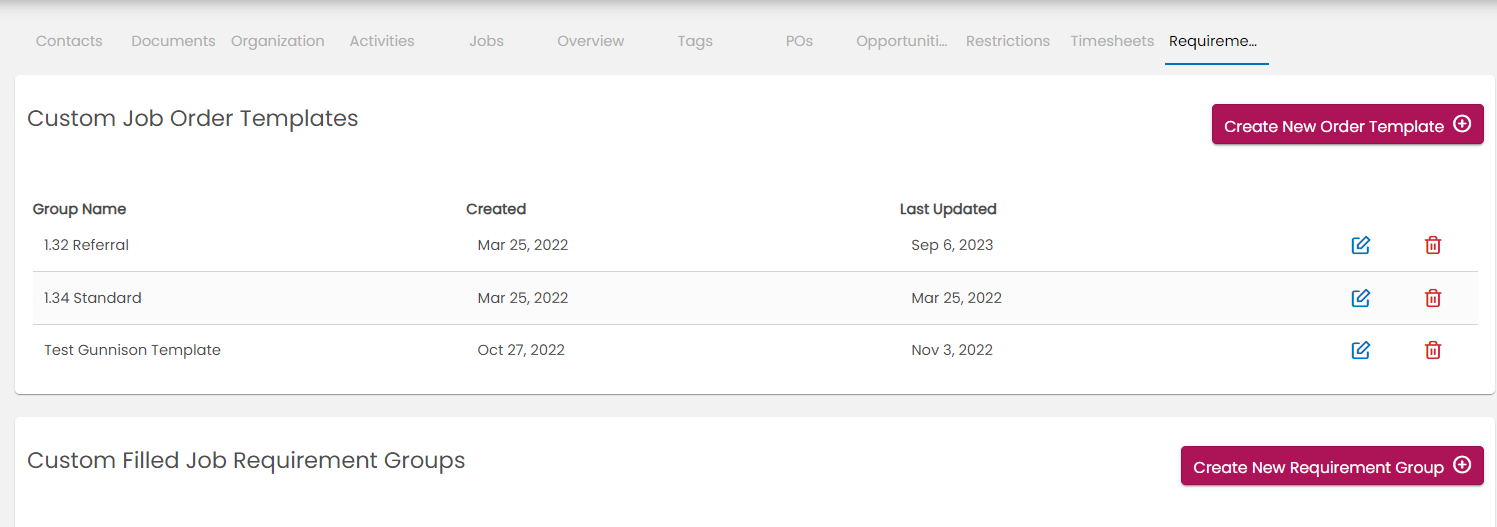
Step 1. In a company’s BOLD profile, navigate to the “Requirements” tab. Click on “Create New Requirement Group,” in the middle of the screen.
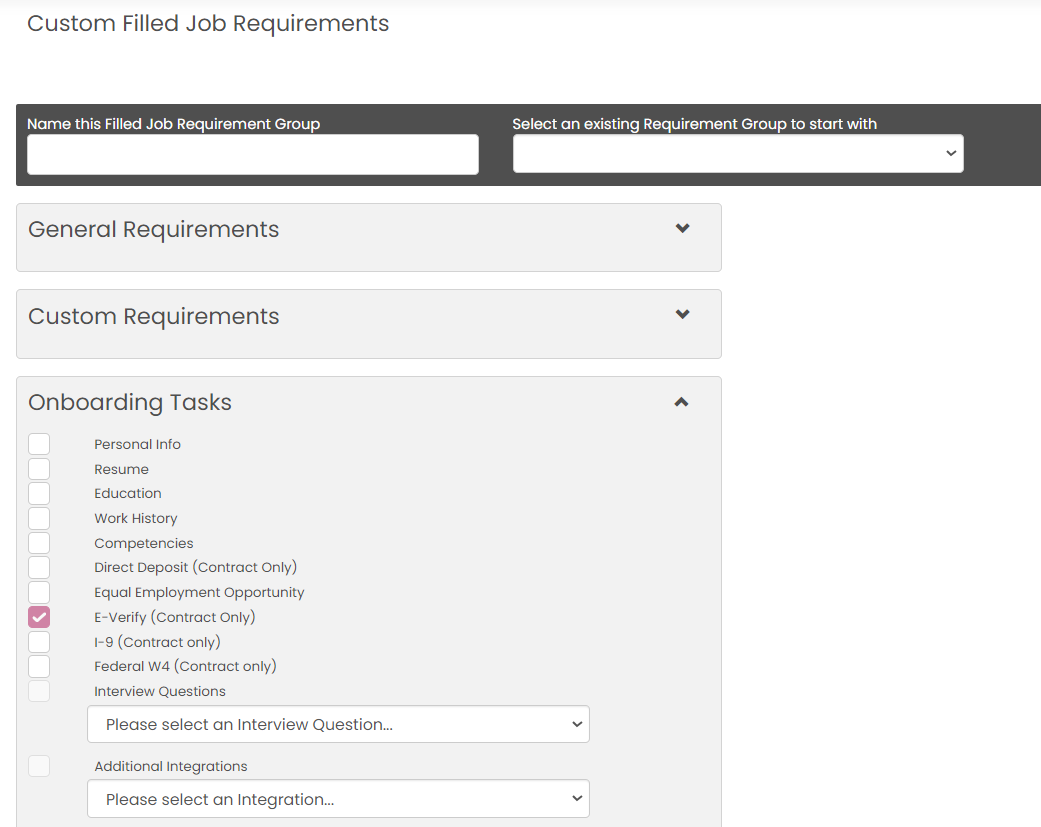 Step 2. In the tab that opens up after clicking that button, scroll down and open the “Onboarding Tasks” dropdown. Here is where you will choose if you want jobs to require Everify. If the box is checked, any job that uses this requirement list will require Everify.
Step 3. Ensure that you have two requirement groups. One for E-verify Required and one for E-verify not required.
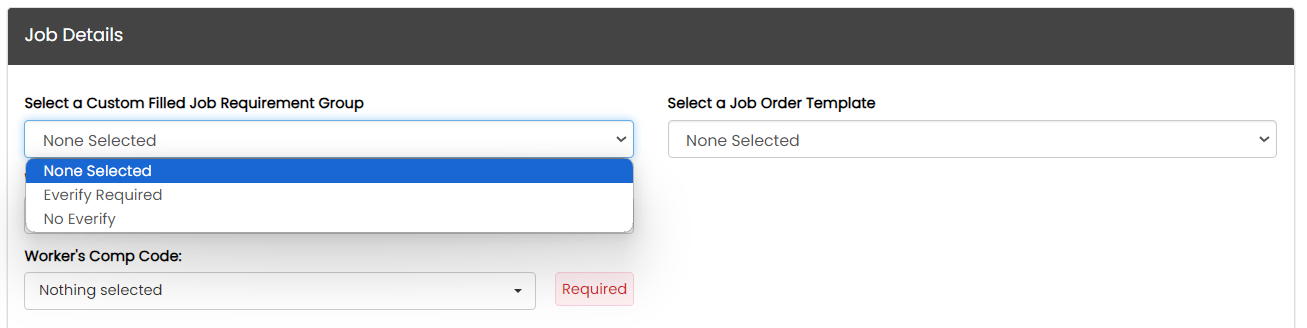 Step 4. When you create a job moving forward, in the Job Details section of the job creation, click on the “Select a Custom Filled Job Requirement Group,” and choose whether or not this job will use E-verify.
![]()
Guidelines and Best Practices {OPTIONAL}
Offer any additional guidelines, tips, or best practices to help with successful execution of this SOP.
![]()
Approval and Revision History
|
Version |
Date |
Approved By |
Changes Made |
|
1.0 |
12/31/2024 |
IT , ML |
Initial Creation |
![]()
Contact Information
For questions or support related to this SOP, contact:
Role/Department: Operations
Email: [email protected]
Extension: 703

